To request a background check using the Checkr API, use the /invitations resource.
The POST /invitations call requires a Checkr Candidate ID. An existing candidate may be used, or a new candidate may be created before requesting a background check.
Using the /invitations resource supports all Checkr screening types and also automates the collection of candidate PII, and distribution of required disclosure and authorization forms.
To create an invitation, you must include the candidate ID for the background check. You may either retrieve this candidate ID for an existing candidate, or create a new candidate if one does not yet exist.
Checkr recommends re-using existing Checkr Candidate objects instead of creating a new one for each report, as it consolidates the candidate experience, and enables more seamless candidate support. It also ensure that Checkr's Analytics module presents more accurate data relating to candidates.
When creating a candidate, be certain to store the unique resource ID returned for that candidate against the representation of that candidate in your application. Use this ID for all subsequent invitations or report orders for that candidate.
$ curl -X POST https://api.checkr.com/v1/candidates -u {access_token}:
-d email=candidate@email.com{
"id": "e44aa283528e6fde7d542194",
"object": "candidate",
"email": "candidate@email.com",
...
}If you do not know or have the Checkr Candidate ID, you can also use query parameters to retrieve a Candidate object by other identifiers. Typically we see this work well with the query parameters email (if you have this data) and/or custom_id (a string that you can use to store your application’s identifier against the Checkr candidate resource). For the full list of possible query parameters, see the List existing Candidates method.
The returned object is a paginated list, as the call is not for a specific object but for a list of objects. See Retrieve an existing Candidate in the Checkr API documentation to retrieve a Candidate object by its ID.
$ curl -X GET https://api.checkr.com/v1/candidates?email=candidate@email.com -u {access_token}:{
"data": [
{
    "id": "e44aa283528e6fde7d542194",
    "object": "candidate",
    "email": "candidate@email.com",
    ...
}
]
"object": "list",
"next_href": null,
"previous_href": null,
"count": 1
}The easiest method to integrate background checks into your application is with the Checkr-Hosted Apply Flow. In this flow, use the Invitations resource to order the background check. Checkr sends an invitation email to the candidate to provide their information and consent, and once the invitation is completed a Report is automatically created. The invitation is valid for 7 days, in which Checkr will send a follow-up notice to the candidate to complete the invitation every 24 hours. If 7 days pass and the candidate has not yet completed the invitation, the invitation will expire and you must create a new invitation to proceed with the candidate.
Parameters required to Create an invitation:
candidate_id: the ID of the candidate for whom the Invitation is created.package: the customer’s Package, selected when ordering the background check.node: thecustom_idof the node associated with the background check.work_locations: an array of work locations, described using country, state, and city. (ISO-3166 alpha-2 format country code, two letter state code, and the name of the city)
package and work_locations are required to create an invitation. If the customer's account has nodes in Checkr, node is also required.
The work_location parameter is used by Checkr to determine compliance requirements for background check reports ordered through the Checkr Hosted Apply Flow. Checkr uses the candidate work location to apply the appropriate state- and city-based fair hiring laws, disclosures, and adverse action procedures. If a city is not provided, Checkr uses the state-based regulation.
$ curl -X POST https://api.checkr.com/v1/invitations -u {access_token}:
      -d candidate_id=e44aa283528e6fde7d542194 \
      -d package=tasker_standard \
      -d node=CHLD_e7c3ab7bf4ad \   // only if nodes exist on the account
      -d work_locations[][state]=CA \   // state required, city optional
-d work_locations[][city]=San+Francisco{
"id": "551564b7865af96a28b13f36",
"object": "invitation",
"uri": "/v1/invitations/551564b7865af96a28b13f36",
"invitation_url":
"https://apply.checkr.com/invite/try-checkr/290f9d6d6e46/test",
"status": "pending",
"created_at": "2015-05-14T17:45:34Z",
"expires_at": "2015-05-21T17:45:34Z",
"completed_at": null,
"deleted_at": null,
"package": "tasker_standard",
"candidate_id": "e44aa283528e6fde7d542194",
"report_id": null
"tags": []
}If your integration calls for more control over your candidate communications, and a more consistent branding experience, Checkr provides an option to suppress the Checkr invitation email and reminders and still leverage the benefits of the Checkr-hosted Invitation flow. Work with your Checkr Partner Manager for more information and to enable this feature for your account.
Use the Checkr Candidate ID you have retrieved or created (see Creating or re-using Candidate objects), the Package "slug" (as selected in step Selecting Packages), and the candidate’s work location to create an Invitation.
Checkr requires Candidates to provide only information that is required for the screenings contained in the Package (such as SSN for criminal screenings, driver license number and state for MVR). If you collect this information in your application, you may choose to pre-fill these fields in the invitation by creating or updating the Candidate object with this data prior to creating the Invitation. Any data collected must adhere to the validation referenced in our Checkr API documentation. By default, candidates may edit any information pre-populated in these fields during the invitation process.
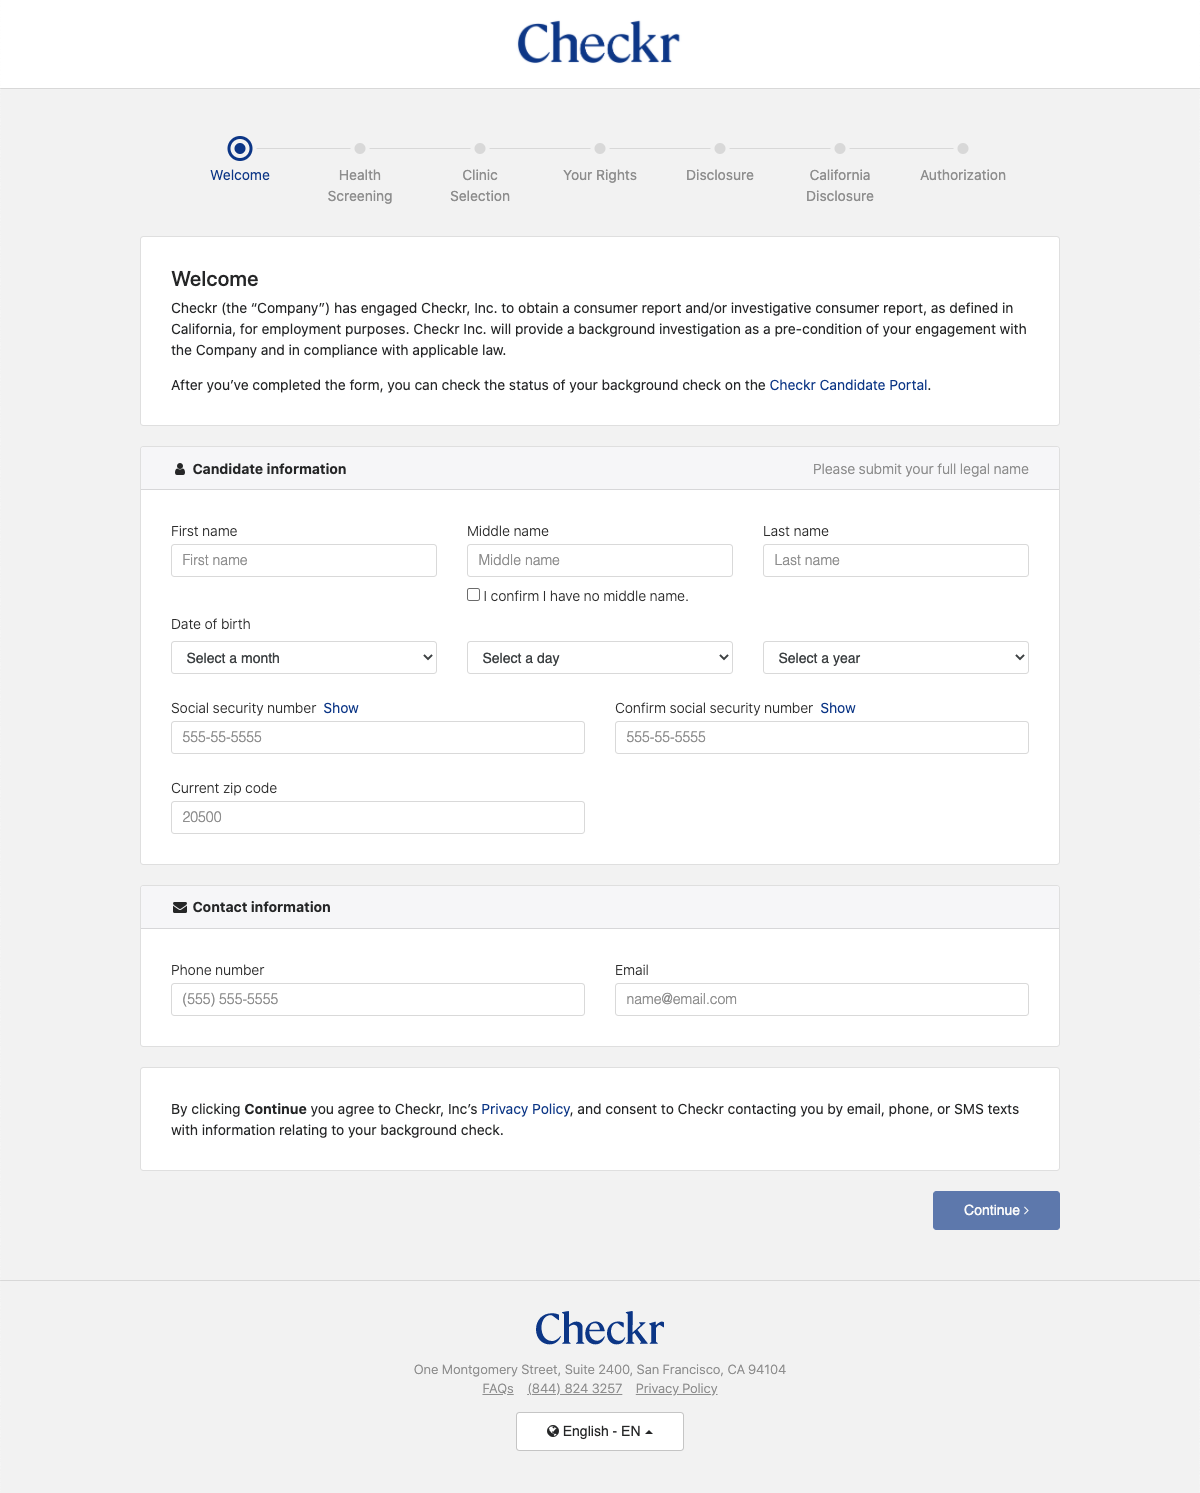
Example: Checkr-Hosted Apply flow "Welcome" screen
When using a Test API key or test access_token generated through a Test Partner Application, Checkr will not send an email to the test candidate email address. To access the invitation flow, retrieve the invitation_url from the Create Invitation response.
When the candidate completes the invitation, the Invitation status is updated to "completed" and the report_id value is updated with the created Report resource ID. Listen for the invitation.completed and report.created webhooks to receive notification of these events.